
Designer Notebook Research
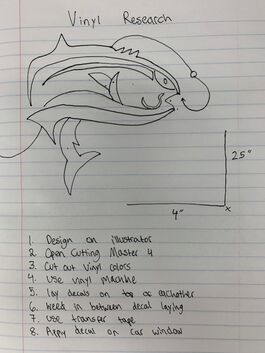
Step by step for creating a vinyl decal:
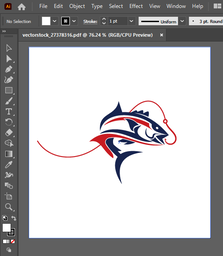
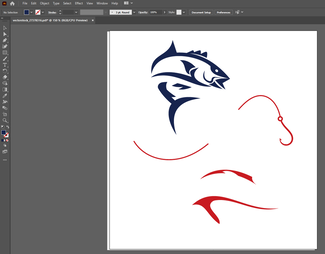
Step 1: Design decal on Illustrator
Step 2: Ungroup decal into three parts
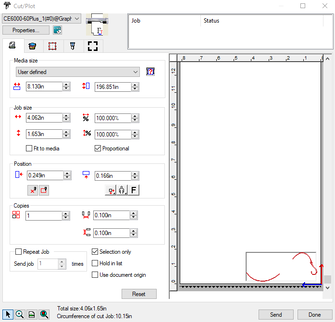
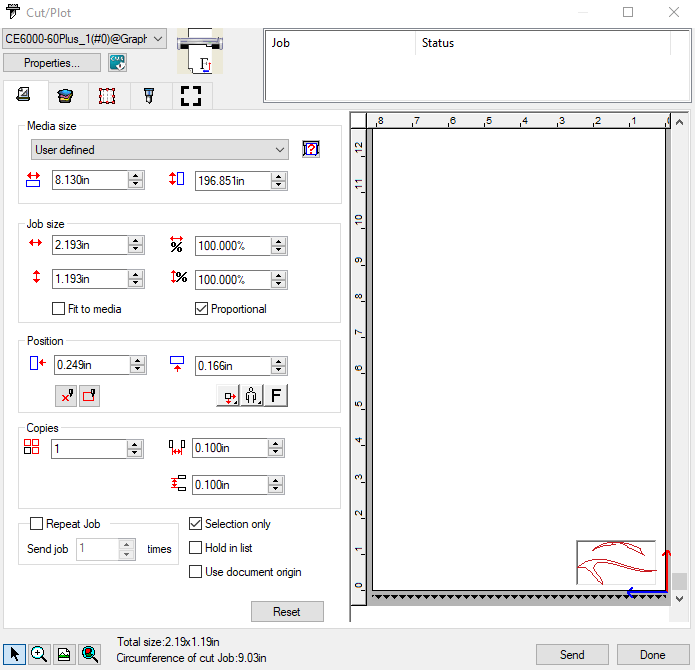
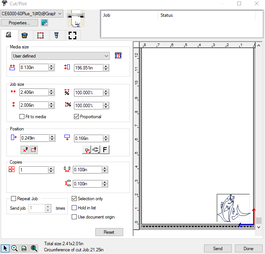
Step 3: Open decal on Cutting Master 4
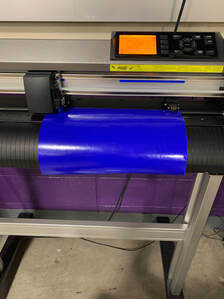
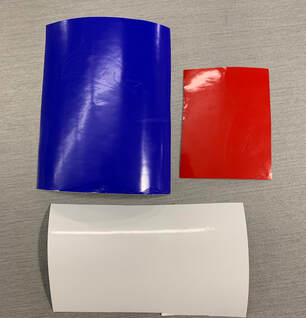
Step 4: Cut/Plot blue body layer
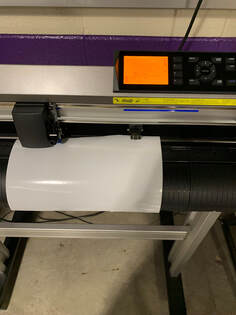
Step 5: Vinyl cutter cuts blue vinyl
Step 6: Cut/Plot red body layer
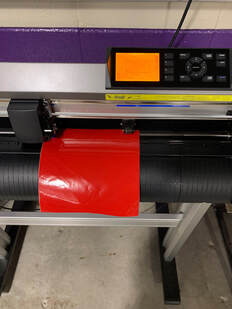
Step 7: Vinyl cutter cuts red vinyl
Step 8: Cut/Plot hook and line
Step 9: Vinyl cutter cuts white vinyl
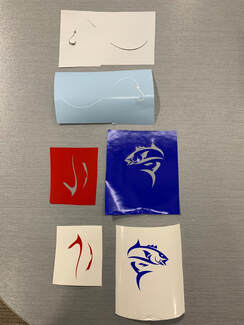
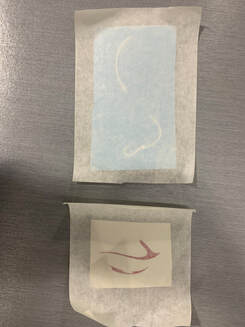
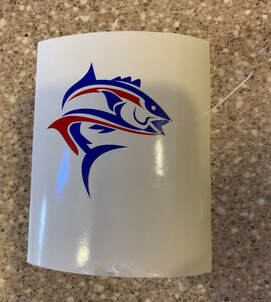
Step 10: Weed backing from each piece of vinyl
Step 11: Apply transfer tape to the red body layer piece and to the hook and line piece
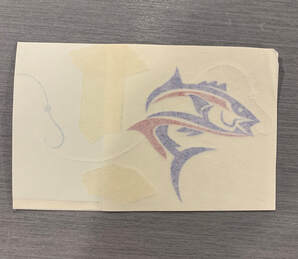
Step 12: Put transfer tape layers on top of blue body layer
Step 13: Apply transfer tape over completed decal
Step 14: Put finished decal on car window
Step 1: Design decal on Illustrator
Step 2: Ungroup decal into three parts
Step 3: Open decal on Cutting Master 4
Step 4: Cut/Plot blue body layer
Step 5: Vinyl cutter cuts blue vinyl
Step 6: Cut/Plot red body layer
Step 7: Vinyl cutter cuts red vinyl
Step 8: Cut/Plot hook and line
Step 9: Vinyl cutter cuts white vinyl
Step 10: Weed backing from each piece of vinyl
Step 11: Apply transfer tape to the red body layer piece and to the hook and line piece
Step 12: Put transfer tape layers on top of blue body layer
Step 13: Apply transfer tape over completed decal
Step 14: Put finished decal on car window
|

|
|
During this vinyl rotation I learned how to design a decal on illustrator and create it with a vinyl cutter. The last vinyl project was designed and printed by the teacher so I actually learned how to do it by myself this time. It was neat to see how fast the vinyl cutter could cut things out. Being able to use a vinyl cutter is important because almost any type of design can be made from the use of it.
